Contents
Installing and Using the Windows Built-in Print Driver – HP Printers
This document is for HP printers and Windows computers.
Windows contains built-in print drivers for many types of printers. These drivers support basic printer functionality for most print jobs.
1: Set Windows Update to automatically download driver software
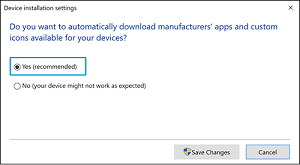
Confirm that your computer is set to automatically download driver software.
- In Windows, search for and open Change device installation settings.
- In the Device Installation Settings window, select the Yes option, and then click Save Changes.
2: Connect your printer to the computer
Connect your printer to the computer before starting the driver installation.
- USB connection to your computer
Connect the printer to the computer with a USB cable.
- Make sure your computer is turned on and connected to the Internet.
- Turn on the printer.
- Connect a USB cable to the USB port on the rear of the printer , and then to the computer.
- If a Found new hardware window displays, follow any prompts to install the driver, and then try to print.
*If you can use your printer, your driver installed, and you do not need to continue with the steps in this document. Continue to the frequently asked questions in this document for more information.
*If you cannot use your printer, continue to the next step.
3: Install the print driver with the Add a Printer wizard
Use the Windows Add a Printer wizard to install the built-in print driver.
Wireless or wired network connection for Windows 10, 8
Install the built-in print driver over a network connection with Windows 10 or Windows 8.
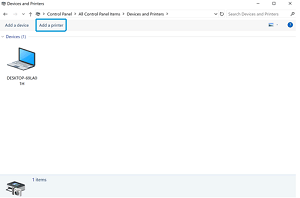
- In Windows, search for and open Control Panel.
- Click Devices and Printers, and then click Add a printer.
- On the Choose a device or printer to add to this PC window, select your printer, click Next, and then follow the on-screen instructions to install the driver. If your printer is not in the list, continue with these steps.
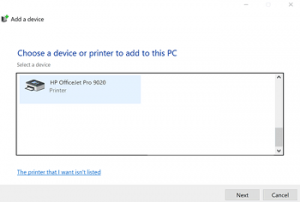
- Click The printer I want isn’t listed, and then select Add a local printer or network printer with manual settings.
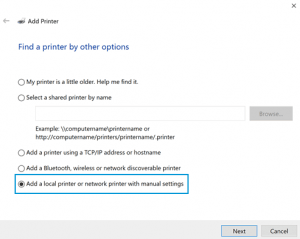
- Click Next.
- Select the port to be used by your printer, such as USB001 for a USB connected printer, and then click Next.
- Click Windows Update, and then wait for the print drivers to update.
- Click HP, Hewlett-Packard, or Hewlett Packard in the Manufacturer pane, and then click the name of your printer in the Printers pane.
*If your printer is in the list, select it, click Next, and then follow the on-screen instructions to install the driver.
*If your printer is not in the list, click the back arrow in the upper left corner of the window two times to return to the Find a printer by other options step, and then continue with these steps.
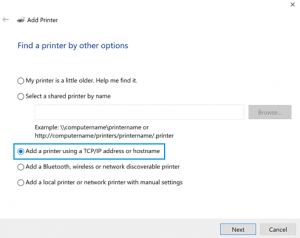
- Select Add a printer using TCP/IP address or hostname, and then click Next.
- Select Autodetect from the Device type drop-down list.
- Type your printer IP address into the text box, and then click Next.
*To find the printer IP address, print a Wireless Network Test report or a Network Configuration page.
- Wait for the computer to connect to the printer, and then click Next to install the print driver.
4: Print document
Print to make sure that your printer is working.
- If you can print, the print driver installed and is working.
- If you cannot print, continue to the frequently asked questions for help.
5: Scan a document (if supported)
Scan a document to make sure the scanner is working.
- If you can scan, the built-in driver installed and is working.
- If you cannot scan, continue to the frequently asked questions for help.
For detail drivers please visit HP Official Site